
EXTERIOR DOOR TRIM REPAIR GUIDE
How to Repair Exterior Door Trim
Learn how to inspect damaged exterior door casing, stop the moisture source, remove unsound wood, rebuild localized rot, and protect the finished repair.
THE SHORT ANSWER
How to Repair Localized Exterior Door Trim Rot
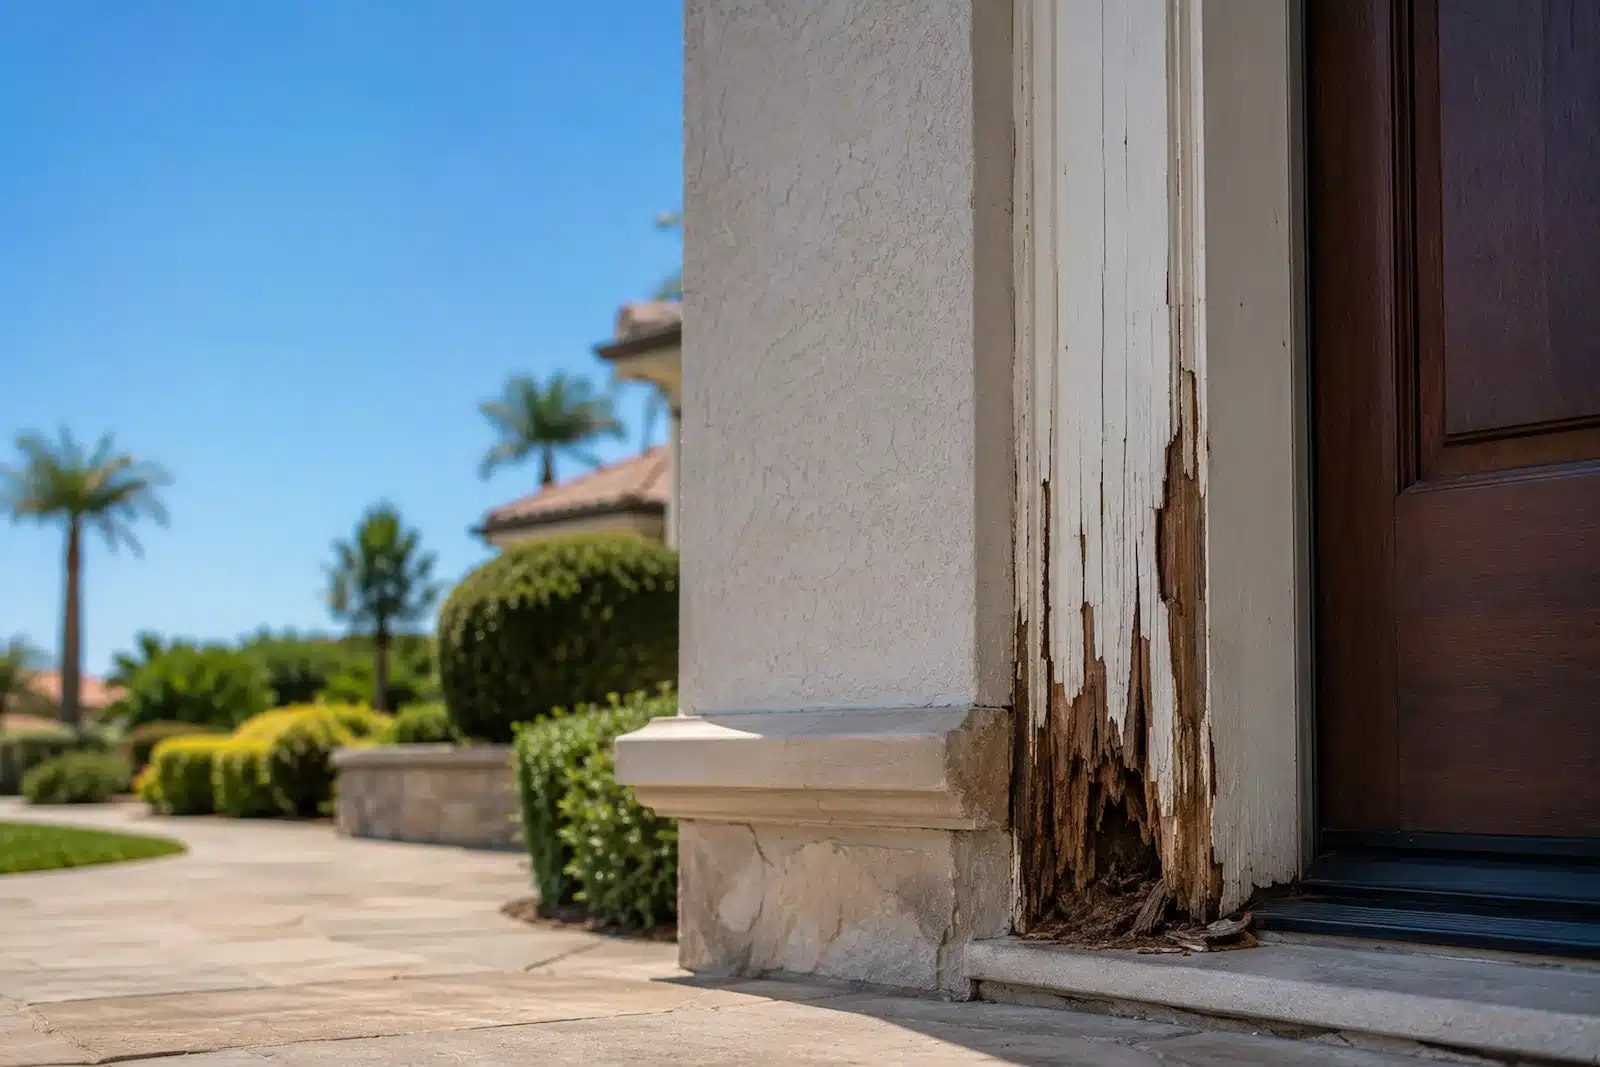
Door casing often deteriorates near the lower corners where rain, splashback, failed caulk, and exposed end grain repeatedly wet the wood. Repair may be practical when enough firm material remains and the opening is still stable.
The Damage Is Localized
Small damaged areas at the lower casing, decorative molding, or trim joints may be rebuilt.
Firm Wood Still Remains
Stable surrounding wood must remain after loose, brittle, and crumbling material is removed.
The Moisture Source Can Be Corrected
Failed caulk, leaks, poor drainage, and direct sprinkler spray must be addressed first.
Start with How to Tell if Wood Is Rotten and What Causes Wood Rot?
INSPECT BEFORE REPAIRING
Inspect Exterior Door Trim Before Repair
The visible soft spot may not show the full extent of the damage. Inspect the exterior casing, lower jamb, threshold, caulk joints, flashing, and nearby wall materials. For additional technical guidance on moisture-related wood deterioration, review the USDA Forest Service Wood Handbook chapter on biodeterioration.
Probe Gently
Check whether the wood is firm or soft without damaging healthy material.
Inspect Lower Corners
Look for peeling paint, open joints, dark staining, and exposed end grain.
Check Door Operation
Confirm that the door opens, closes, latches, and seals correctly.
Review How Much Rotten Wood Should Be Removed? before cutting or scraping.
MAKE THE RIGHT DECISION
When Should Exterior Door Trim Be Repaired or Replaced?
Repair is best for localized deterioration. Replacement is usually more appropriate when most of the casing is damaged, the jamb has failed, or hidden framing is affected.
Repair May Be Practical When
The damaged area is limited, firm wood surrounds the cavity, and the profile can be rebuilt accurately.
Replacement May Be Better When
Rot extends through most of the trim, the jamb is unstable, or wall framing has widespread damage.
Compare the options in Repair or Replace Rotten Wood?
PREPARATION MATTERS
How to Prepare Exterior Door Trim for Repair
A durable repair needs clean, dry, stable wood. Do not place repair material over loose fibers, trapped moisture, failed paint, dirt, or deteriorated caulk.
Stop the Water
Repair leaks, replace failed caulk, improve drainage, and redirect irrigation.
Remove Unsound Wood
Remove soft, brittle, crumbling, and detached material while preserving firm wood.
Clean and Treat
Follow the complete wood preparation process before rebuilding.
REBUILD THE DAMAGE
How to Rebuild Exterior Door Trim
The repair should recreate the casing edge, molding, corner, and reveal while preserving the correct door clearance and weather seal.
Strengthen Remaining Wood
Apply the appropriate WRP consolidant to weakened but salvageable fibers.
Rebuild Missing Areas
Use WRP epoxy repair dough to recreate missing corners and profiles. See the epoxy repair dough guide.
Match the Original Shape
Restore the correct thickness, reveal, edge, and decorative detail.
CHECK THE OPENING
Evaluate the Jamb, Threshold, and Hidden Framing
A trim repair should not hide damage in the door jamb, threshold, wall framing, flashing, or hardware attachment points.
Inspect the Jamb
Check whether rot extends behind the decorative trim into the structural door frame.
Inspect the Threshold
Look for water entry, soft flooring, failed flashing, or damage beneath the sill.
Get Professional Guidance When Needed
Consult a qualified professional if the opening has shifted or framing damage is uncertain.
For damage extending into the jamb, review How to Repair Rotten Door Frames.
THE WRP REPAIR PROCESS
How to Repair Exterior Door Trim in Three Stages
Prepare and strengthen suitable remaining wood, rebuild the missing section, and restore a finish-ready trim profile.
Prepare and Strengthen
Correct moisture problems, remove unsound wood, clean the cavity, and consolidate suitable fibers.
Rebuild and Shape
Restore the missing casing edge, corner, or molding with WRP epoxy repair material.
Finish and Protect
Refine the surface, confirm door operation, then prime, paint, caulk, and maintain the area.
COMMON QUESTIONS
Frequently Asked Questions About Exterior Door Trim Repair
Can rotted exterior door trim be repaired without replacing the whole casing?
Sometimes. Localized damage may be repaired when enough firm wood remains and the original profile can be rebuilt.
Why does exterior door trim rot near the bottom?
Rain splash, failed caulk, exposed end grain, poor drainage, and repeated wetting commonly affect lower corners.
Does all soft wood need to be removed?
Loose, brittle, crumbling, and detached material should be removed. Preserve firm wood that can support the repair.
Can epoxy repair material be applied to damp wood?
No. Correct the moisture source and allow the prepared area to dry enough for proper bonding and curing.
What if the door jamb is also rotten?
The jamb may require a separate repair or replacement. Review the door-frame guide or consult a qualified professional.
Can the repaired trim be sanded, caulked, and painted?
Yes. After curing, the repair can be shaped and sanded before compatible primer, paint, and sealant are applied.
Which WRP kit should I use?
Review Choosing the Right WRP Repair Kit or contact WRP.
CONTINUE PLANNING YOUR REPAIR
Prepare for a Complete Exterior Door Trim Repair
How to Repair Rotten Door Frames
Learn what to do when damage extends beyond the decorative trim.
How to Repair Garage Door Wood Trim
Compare similar moisture damage around a garage opening.
Choosing the Right WRP Repair Kit
Compare kit sizes based on repair depth, size, and quantity.