
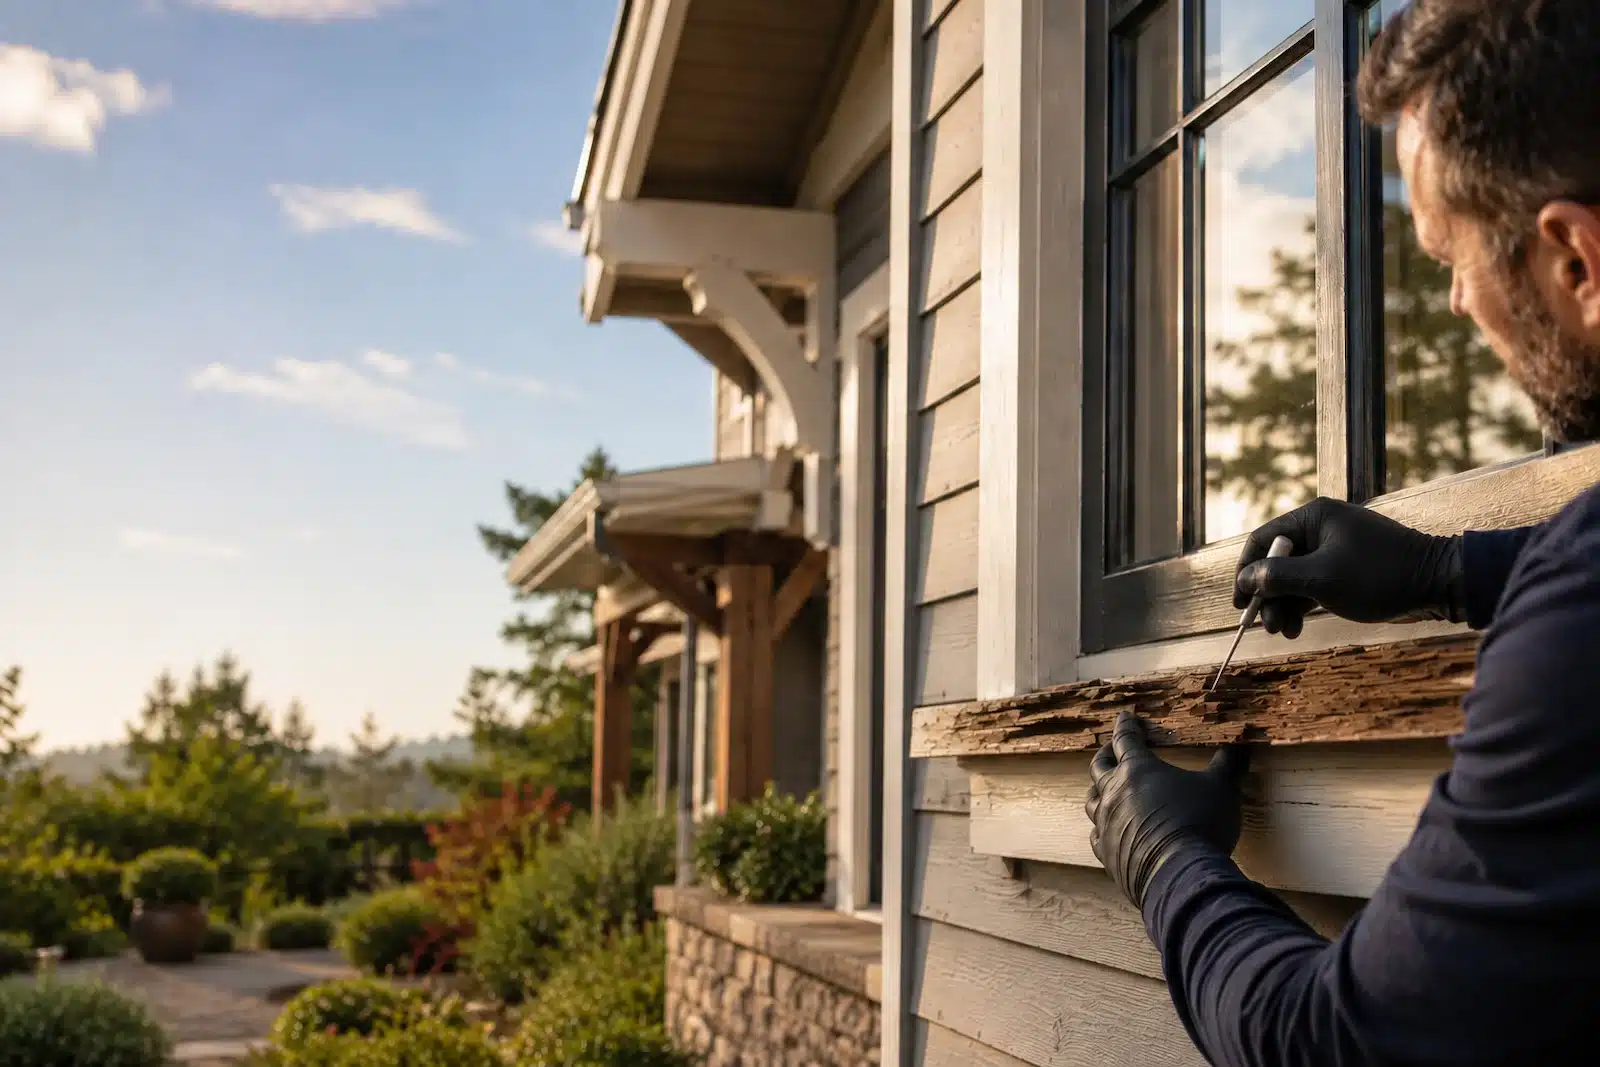
WOOD ROT INSPECTION
How to Tell if Wood Is Rotten
Rotten wood may feel softer than nearby sound wood and can look cracked, sunken, crumbly, or misshapen. Peeling paint or discoloration alone does not confirm rot. Compare the area, probe gently only where it is safe, and look for the moisture source.
THE QUICK ANSWER
Quick Answer: Look for Changes in Appearance and Firmness
A suspicious area is more likely to be deteriorated when several clues appear together: repeated moisture, staining or coating failure, a changed surface profile, and fibers that feel softer or break apart more easily than nearby sound wood. A light probe check can help identify an area that needs further inspection, but it does not establish structural safety or reveal every concealed condition.
Know when to stop
Stop if the area carries a load, forms part of a stair or guard, shows movement, or cannot be inspected safely. Those conditions need appropriate evaluation before a repair decision is made.
VISIBLE CLUES
Six Common Signs of Rotten Wood
Look for combinations of clues. One stain, crack, or patch of peeling paint does not confirm rot by itself.
Soft or Spongy Areas
Wood that yields much more easily than nearby sound wood may be deteriorated. Compare gently rather than relying on softness alone.
Crumbling or Loose Fibers
Fibers that flake, break away, or feel stringy under light pressure are a stronger warning that sound material has been lost.
Deep Cracks or a Changed Shape
Deep splits, sunken edges, distortion, or missing portions can expose deterioration below the surface. Small surface checks can also result from weathering.
Peeling or Blistered Paint
Repeated bubbling, lifting, or peeling often points to moisture below the coating. Paint failure alone does not prove that the wood has decayed.
Discoloration or Staining
Dark, gray, or uneven staining can be a moisture warning, especially when it appears with softness, cracking, or repeated coating failure.
Persistent Dampness or Surface Growth
Wood that stays damp, smells musty, or shows surface growth needs closer inspection and correction of the moisture source. Do not identify the condition from odor or growth alone.
INSPECT CAREFULLY
How to Check Wood for Rot Safely
Start with the least destructive checks and inspect the complete component—not only the most visible spot.
Look at the Full Component
Note coating failure, open joints, shape changes, water staining, loose fasteners, and areas that remain damp.
Compare Nearby Wood
Compare the suspect area with another part of the same component. Differences in firmness, texture, and surface condition can help identify where closer inspection is needed.
Probe Gently Where Appropriate
In an accessible, noncritical area, apply light pressure with an awl or small screwdriver. Sound wood usually offers firmer resistance. Wood that compresses, crumbles, or releases loose fibers may be deteriorated.
Check Edges and Connections
Inspect end grain, joints, lower corners, fastener locations, undersides, bases, and places where water can collect or enter behind another component.
Trace the Moisture
Look for the leak, drainage problem, failed coating, open joint, condensation, or repeated wetting associated with the area. Continue with the guide to what causes wood rot for a fuller explanation.
DEFINE THE SCOPE
Repair, Replace, or Get Further Evaluation?
The decision depends on the complete component, the moisture source, the remaining wood, and any connected conditions—not only the size of the visible soft spot.
Localized Repair May Be Considered When
- The affected area appears limited.
- The moisture source can be identified and corrected.
- Unsuitable material can be removed without creating an unsafe condition.
- Suitable remaining wood can be clearly identified.
- No connected structural or safety concern is present.
Replacement or Further Evaluation May Be Needed When
- Deterioration is widespread or appears at several connected points.
- Damage continues behind a wall, window assembly, roof edge, bearing area, or concealed cavity.
- A post, stair, guard, railing, beam, or other safety-related component moves or has a questionable connection.
- The remaining wood or moisture source cannot be confidently evaluated.
- Safe access or temporary support is required.
WRP can help with product planning after the repair scope is understood. Product selection does not establish structural suitability, load capacity, or building-envelope safety.
NEXT STEPS
What to Do After You Confirm Localized Deterioration
Move from diagnosis to repair planning in a deliberate order.
MATERIAL PLANNING
Where WRP Fits in a Localized Wood Repair
WRP materials may be part of a localized repair after the moisture source is addressed, unsuitable material is removed, and suitable remaining wood has been identified. The material plan depends on the prepared repair volume and project conditions; it does not determine whether a component is structurally suitable for repair.
See how the WRP process works, then use Choosing the Right WRP Repair Kit to compare kit sizes after the repair scope is clear.
COMMON QUESTIONS
Questions About Identifying Rotten Wood
What does rotten wood feel like?
Deteriorated wood may feel softer, more compressible, or more crumbly than nearby sound wood. Compare the same component gently; softness alone is not a complete diagnosis.
Can peeling paint mean the wood is rotten?
Peeling or blistered paint can signal moisture beneath the coating, but it does not prove that the wood has decayed. Check the wood’s firmness, shape, joints, and moisture history.
How can I check whether the wood is soft underneath?
In an accessible, noncritical area, apply light pressure with an awl or small screwdriver and compare the resistance with nearby wood. Do not force the tool through a sound finish or probe a load-bearing or safety-critical component.
What if the damage continues behind the visible surface?
Stop treating it as an isolated surface repair. Damage behind trim, walls, roof-edge components, bearing areas, or connected framing may require additional access and appropriate evaluation.
Does rotten wood always need to be replaced?
Not always. A localized repair may be considered when the moisture source can be corrected, unsuitable material can be removed, suitable wood remains, and no structural or safety concern is present.
What should I do after I confirm localized rot?
Correct the moisture source, establish the full damage boundary, decide whether repair is appropriate, prepare the remaining area, and only then select repair materials.
PLAN A LOCALIZED REPAIR
Ready to Plan a Localized Wood Repair?
After the moisture source is addressed and the area is confirmed suitable for localized repair, use the Repair Wizard to compare kit options or browse the available wood repair kits.