
WOOD ROT INSPECTION
How to Tell if Wood Is Rotten
See what rotten wood looks like, how to check suspicious areas with a simple probe test, and when localized wood rot may be repairable instead of requiring full replacement.
WOOD ROT INSPECTION
What Does Rotten Wood Look Like? 6 Signs to Check
Rotten wood can look dark, cracked, blistered, fibrous, misshapen, or crumbly. It may also be hidden beneath paint or a thin outer surface that still looks intact. Use these six warning signs to identify areas that deserve a closer inspection.
Discoloration
Rotten wood often becomes darker than the surrounding area. Brown, gray, or black staining may indicate that moisture has been trapped for an extended period.
Cracks and Splits
Natural weathering creates small surface cracks, but deep splits, separated wood fibers, and irregular cracking can indicate decay beneath the surface.
Soft or Spongy Areas
Healthy wood feels firm. If a screwdriver or awl easily presses into the wood, the fibers may have begun breaking down from moisture and fungal decay.
Peeling or Blistered Paint
Paint that bubbles, lifts, or repeatedly peels may indicate moisture trapped beneath the coating and deterioration in the wood below.
Fungal or Musty Growth
Surface growth, a musty odor, or persistent dampness can indicate conditions that support fungal decay and should prompt a closer inspection.
Crumbling or Loose Fibers
Rotten wood may break apart, flake, or crumble when lightly probed because decay has weakened the wood fibers beneath the surface.
Some signs are easy to see, while others require a closer inspection. Next, learn what causes wood rot or return to the WRP Learning Center to continue learning about wood restoration.
SIMPLE INSPECTION STEPS
How to Check Wood for Rot With a Simple Probe Test
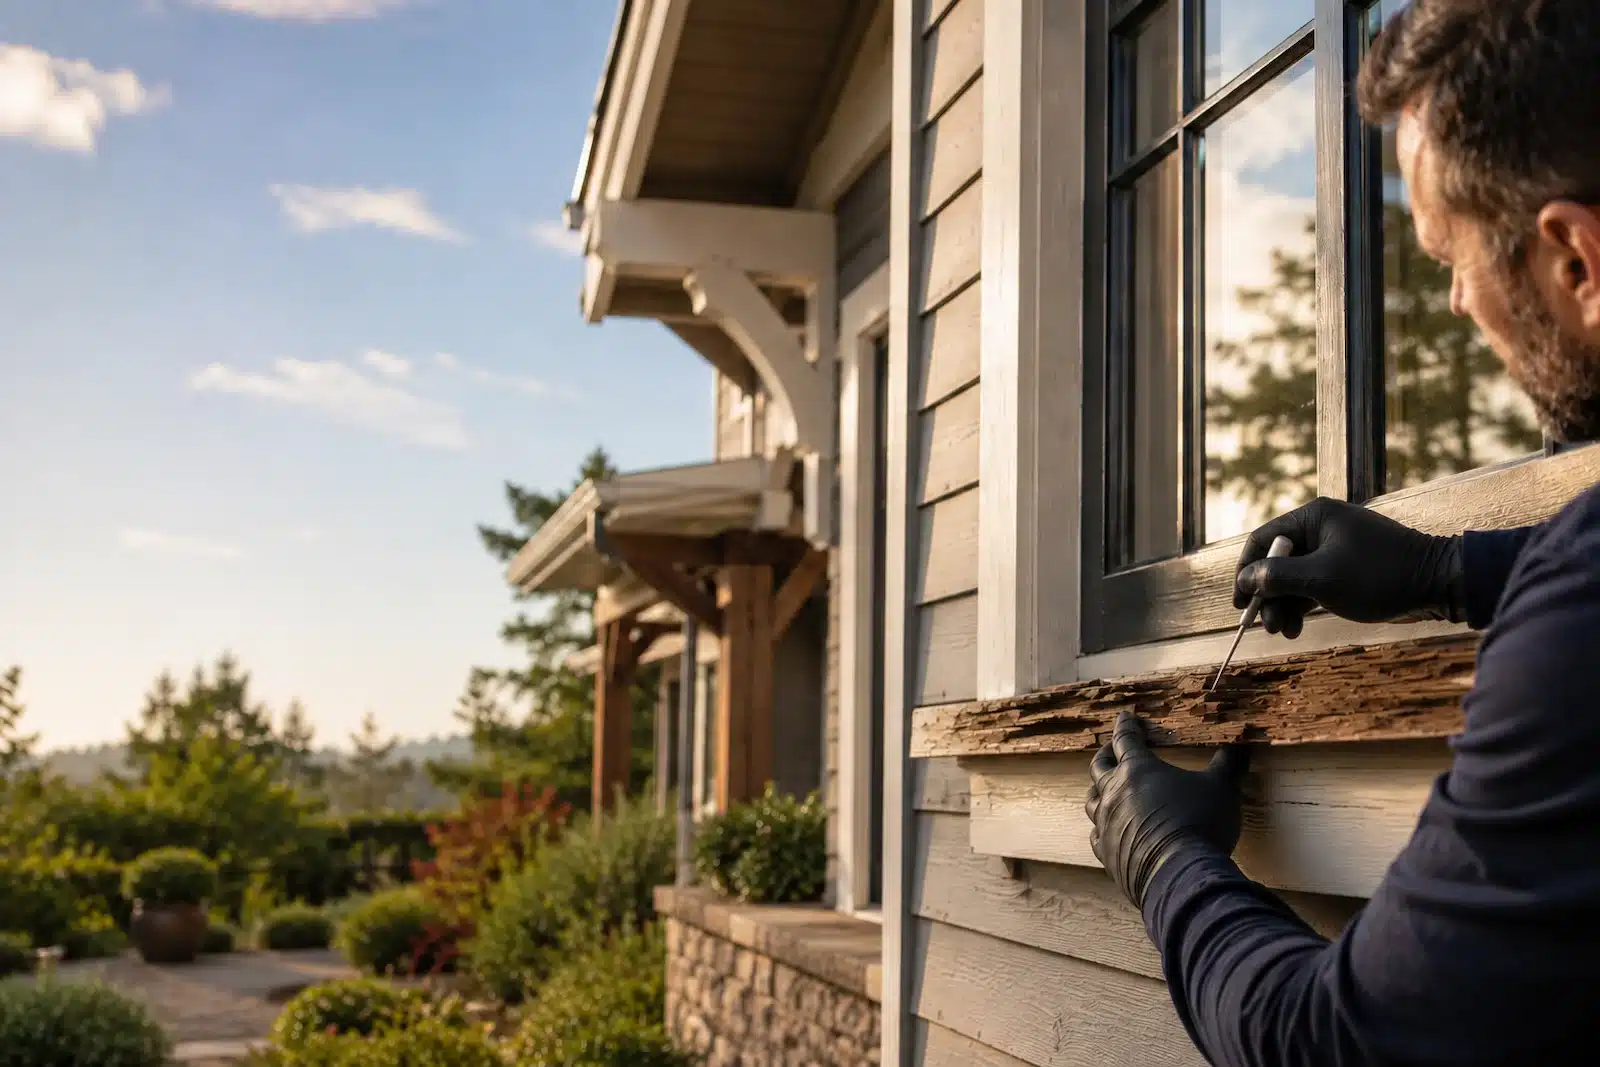
You do not need specialized equipment to check wood for rot. A careful visual inspection followed by a gentle probe with an awl or small screwdriver can often reveal whether the wood fibers are still firm or have begun to decay.
Look Closely
Examine painted surfaces, trim, beam ends, window sills, posts, and fascia boards for discoloration, cracking, peeling paint, or areas that remain damp.
Gently Probe the Wood
Use an awl or small screwdriver to gently press suspicious areas. Healthy wood should resist pressure. Soft wood that compresses easily may indicate decay.
Find the Moisture Source
If rot is present, determine why the wood stayed wet. Leaks, failed caulking, poor drainage, or overflowing gutters should be corrected before beginning repairs. For additional technical guidance, review the USDA Forest Service chapter on wood biodeterioration.
Once you've identified rotten wood, learn what caused the damage and then review how the WRP repair process restores damaged wood.
HIGH-RISK LOCATIONS
Common Places to Check for Wood Rot
Exterior wood that is repeatedly exposed to moisture is most likely to develop rot. During an inspection, pay extra attention to these common problem areas.
Fascia Boards
Roof edges are constantly exposed to rain and overflowing gutters. Inspect fascia boards for peeling paint, soft wood, and dark staining.
Window Sills & Trim
Water often collects around windows where failed caulking or paint allows moisture to penetrate behind the trim.
Posts & Columns
Porch columns and support posts commonly trap moisture near their bases where water splashes from concrete or landscaping.
Decks & Stairs
Stair stringers, deck boards, and railing posts frequently hold water and should be inspected for soft spots and cracking.
Beam Ends
Structural beams often begin deteriorating at their exposed ends where moisture repeatedly enters the end grain.
Exterior Trim
Decorative trim, siding corners, and door casings often develop hidden rot where moisture becomes trapped behind paint or sealant.
These are the areas where WRP most commonly sees wood rot. Browse real before-and-after repairs, learn why wood rot develops, or return to the WRP Learning Center for more educational guides.
EVALUATE THE DAMAGE
How Serious Is the Wood Rot?
Not every soft spot means the entire board must be replaced. The next step is to determine how much sound wood remains, whether the moisture source can be corrected, and whether the damaged area can support a durable repair.
Localized Damage
Small areas of decay surrounded by firm, sound wood are often good candidates for repair once the moisture source has been corrected.
Damage Extending Beyond the Surface
If probing reveals softness farther around the visible area, additional material may need to be removed before the repair can be properly evaluated.
Major or Structural Deterioration
Wood that has lost most of its strength, carries an important load, or shows widespread decay may require professional evaluation, reinforcement, or replacement.
The goal is to preserve sound wood, not cover weakened material. Review how the WRP repair process works, browse real repair examples, or contact WRP for help selecting materials for a repairable area.
REPAIR OR REPLACE?
Can Rotten Wood Be Repaired?
Yes, many localized areas of rotten wood can be repaired when enough sound wood remains, the moisture source can be corrected, and the damaged component is suitable for restoration. The condition of the surrounding wood is more important than the size of the visible opening alone. Structural or widespread deterioration may require professional evaluation, reinforcement, or replacement.
Sound Wood Remains
Repair is often possible when the deteriorated material is surrounded by firm wood that can support a durable restoration.
The Moisture Source Can Be Corrected
Leaks, failed sealant, poor drainage, or trapped moisture must be corrected before the damaged wood is restored.
The Original Shape Can Be Rebuilt
Missing portions of fascia, trim, posts, beams, sills, and other components can often be rebuilt after loose decay has been removed.
Before choosing repair materials, review Can Rotten Wood Be Repaired?, see how the WRP repair process works, compare WRP repair kit sizes, browse completed wood restorations, or contact WRP for product guidance.
NEXT STEPS
What to Do After Finding Rotten Wood
Once you confirm that wood is deteriorated, stop the moisture, determine how far the damage extends, and prepare the remaining material before rebuilding the area.
Correct the Moisture Problem
Repair leaks, improve drainage, replace failed caulk, and correct any condition that keeps the wood wet.
Remove Loose Deterioration
Remove soft, crumbling, or detached material until the remaining wood is firm enough to support a restoration.
Strengthen and Rebuild
Treat and consolidate the remaining wood, rebuild missing areas, restore the original profile, and apply a protective finish.
Review real before-and-after repairs or return to the Wood Repair Learning Center for more inspection and restoration guidance.
COMMON QUESTIONS
Frequently Asked Questions: How to Tell if Wood Is Rotten
These answers cover the basic inspection process. Learn what causes wood rot or review how damaged wood is restored.
What is the easiest way to tell if wood is rotten?
Look for discoloration, peeling paint, deep cracks, loose fibers, and areas that feel soft. A small awl or screwdriver can be used gently to test suspicious wood for resistance.
Should healthy wood feel hard when probed?
Yes. Sound wood should resist light pressure. If the tool easily sinks into the surface or the wood crumbles, decay may be present.
Can wood look solid but be rotten inside?
Yes. Paint or a thin outer layer may remain intact while decay develops underneath. Inspect around joints, cracks, fasteners, and areas that stay damp.
Does dark wood always mean rot?
No. Discoloration may come from dirt, rust, tannins, or normal weathering. Dark staining combined with softness, cracking, or persistent dampness is more concerning.
Can I inspect painted wood for rot?
Yes. Look for blistering, peeling, separating joints, or soft areas. Paint can hide damage, so inspect carefully around failed coatings and exposed edges.
When should I stop probing the wood?
Use only gentle pressure. Stop if the component is carrying a structural load, appears unstable, or probing could cause additional damage.
Can rotten wood be repaired instead of replaced?
Many localized areas can be repaired when enough sound wood remains and the moisture source can be corrected. Widespread, unstable, or structural deterioration may require reinforcement, professional evaluation, or replacement. Review Can Rotten Wood Be Repaired? and the complete restoration process.
What does rotten wood look like?
Rotten wood may appear darker, cracked, blistered, fibrous, misshapen, or crumbly. It may also remain hidden beneath paint, trim, flashing, or a thin outer layer that still looks intact.
How do you check wood for rot?
Inspect for discoloration, peeling paint, open joints, softness, and persistent dampness. Then use an awl or small screwdriver to apply gentle pressure. Sound wood should resist the tool, while decayed wood may compress, crumble, or allow easy penetration.
Does all rotten wood need to be replaced?
No. Localized deterioration may be repairable when enough stable wood remains and the moisture source can be corrected. Replacement is more likely when decay is widespread, the component is unstable, or the remaining wood cannot support a dependable repair.
CONTINUE LEARNING
What to Do After You Find Rotten Wood
Now that you know how to tell if wood is rotten and what rotten wood looks like, learn why the damage developed, review the restoration process, or explore real repairs and professional products.
Understand What Caused the Rot
Learn how leaks, failed coatings, poor drainage, and trapped moisture create the conditions that allow wood rot to develop.
Learn the Repair Process
See how WRP prepares deteriorated wood, strengthens the remaining fibers, rebuilds missing areas, and finishes the completed repair.
Review Real Repairs
Browse before-and-after examples of fascia, beams, posts, window trim, stairs, and other damaged wood restored with WRP products.