
PLANNING A WOOD REPAIR
How Much Rotten Wood Should Be Removed?
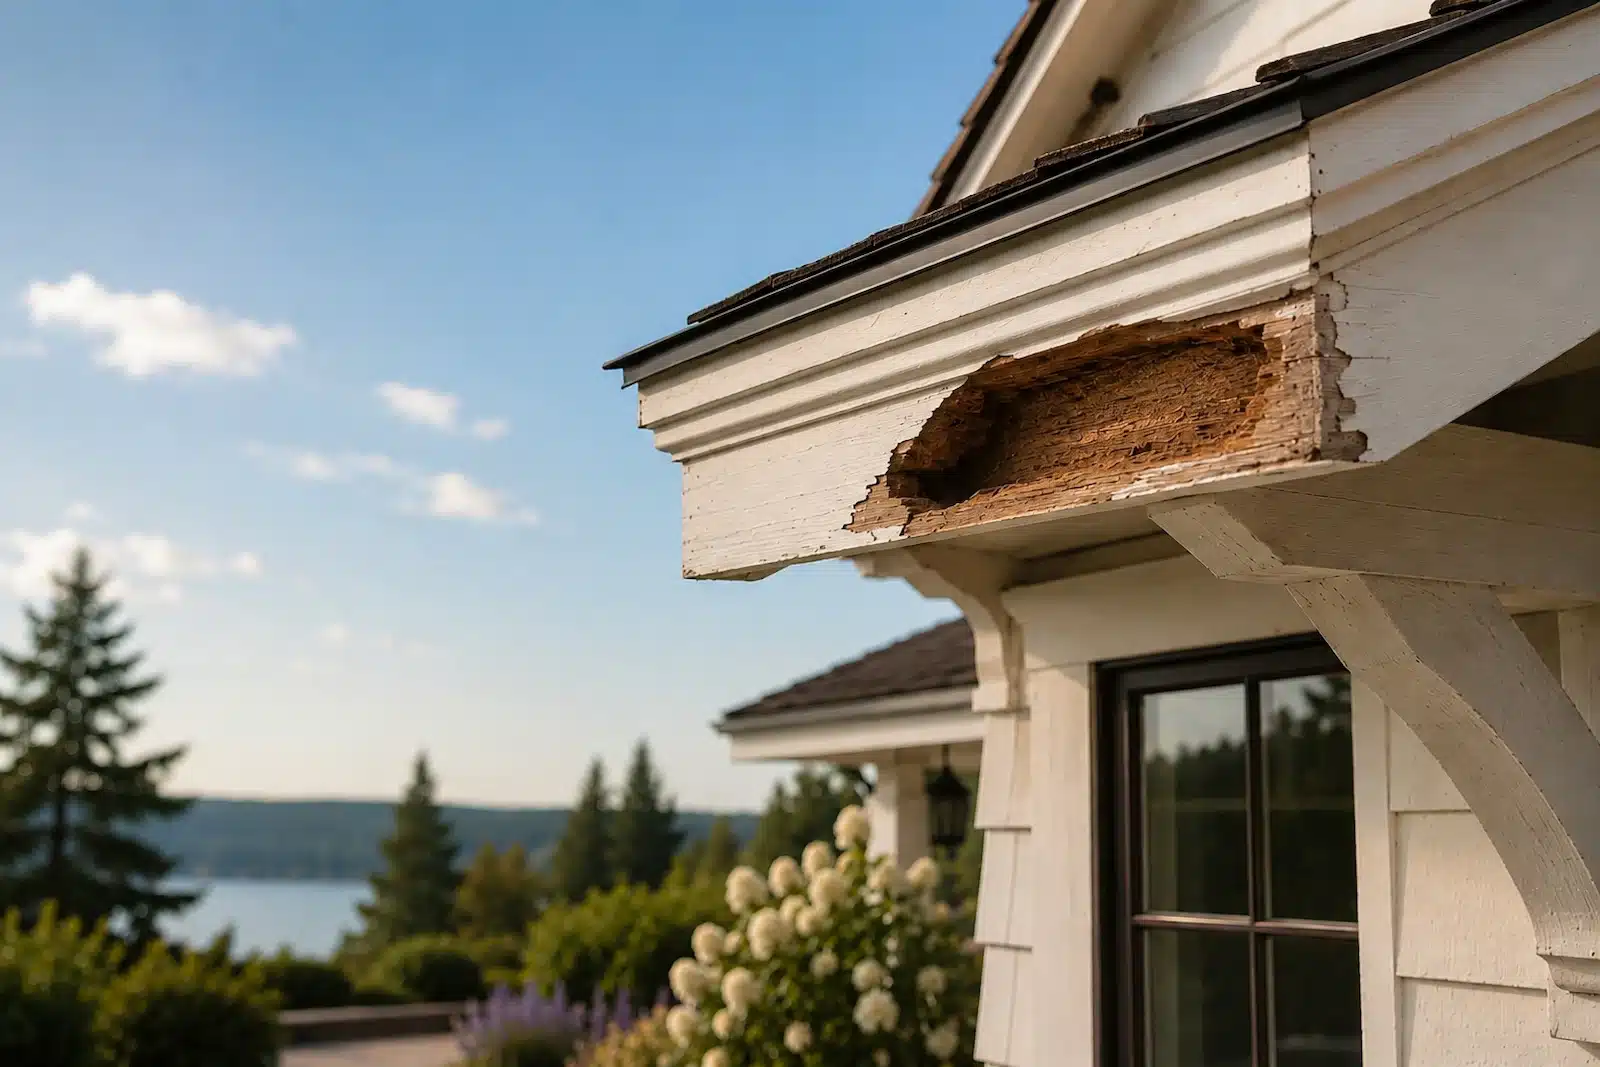
How much rotten wood should be removed? Remove loose, crumbling, detached, or structurally unreliable material while preserving firm wood that remains securely attached and suitable for the planned repair. The correct stopping point depends on condition—not color alone or an arbitrary cavity shape.
THE SHORT ANSWER
Remove All Unsound Wood, but Preserve Firm Material
Unsound wood should be removed until the remaining material is firm, stable, securely attached, and suitable for the specified repair system. The goal is not to create the largest cavity possible. It is to remove soft, brittle, crumbling, or detached wood while preserving healthy wood.
Remove Loose Material
Wood that crumbles, flakes, separates, or falls away under light pressure should be removed before repair materials are applied.
Keep Firm Wood
Wood that remains dense, stable, and securely attached may be preserved and prepared as part of the restoration.
Inspect Beyond the Visible Opening
Rot often extends behind paint, trim, or apparently solid edges. Probe the surrounding area before deciding the cavity is ready.
Before removing material, review how to identify rotten wood and whether repair or replacement is appropriate.
IDENTIFY UNSOUND MATERIAL
How to Tell Which Wood Should Be Removed
The condition of the wood matters more than its color alone. Use light pressure, visual inspection, and the way the fibers respond to determine whether material is sound enough to remain.
Soft or Spongy Wood
Material that compresses easily under gentle pressure has lost strength and should usually be removed.
Brittle or Crumbling Fibers
Wood that breaks into fragments, powders, or separates into loose fibers cannot provide a reliable repair surface.
Detached or Delaminated Wood
Layers that have separated from the main component or move independently should be removed until stable material remains.
Persistently Damp Wood
Wet wood should not be sealed inside a repair. The moisture source must be corrected and the area allowed to dry.
Wood That Holds Fasteners Poorly
If screws, nails, or hardware no longer hold securely, inspect farther around the connection for hidden deterioration.
Firm, Stable Wood Can Remain
Wood that resists light probing, remains securely attached, and retains its structure may be preserved and prepared.
FOLLOW THE DECAY
How Far Should You Remove Rotten Wood?
Continue removing loose and unreliable material until the cavity is bordered by stable wood that can be evaluated and prepared for the repair. The shape should follow the actual path of the decay, not an arbitrary square or rectangle.
Start at the Weakest Area
Begin where the wood is clearly loose or soft and work outward gradually rather than removing large amounts at once.
Probe the Cavity Edges
Check the top, bottom, sides, and back of the opening. Hidden softness may remain behind a firm-looking surface.
Follow Natural Grain and Damage
Let the cavity follow the real deterioration rather than making perfectly straight machine-cut edges.
Avoid Removing Healthy Wood
Once the wood is stable and sound enough to support the repair, additional excavation may be unnecessary.
Check Hidden Connections
Inspect joints, fasteners, brackets, and beam pockets where decay may continue beyond the visible cavity.
Stop if Stability Is Uncertain
Load-bearing or unstable components may require professional evaluation before additional material is removed.
AVOID THESE PROBLEMS
Common Mistakes When Removing Rotten Wood
Removing too little can leave an unstable foundation. Removing too much can create unnecessary work and reduce the amount of original material available to support the repair.
Stopping at the Painted Edge
Paint can hide continued decay. Inspect beneath the coating and around the full perimeter of the cavity.
Filling Over Soft Fibers
Soft or detached material cannot support a long-lasting repair and may allow the restoration to separate.
Creating a Perfect Square
The cavity should follow the deterioration. Removing healthy wood only to create straight edges is usually unnecessary.
Ignoring the Back of the Cavity
Rot may continue deeper than the visible face. Check the full depth before deciding the area is ready.
Removing Wood While It Is Still Wet
Correct the moisture source and allow the area to dry so the condition of the remaining fibers can be evaluated accurately.
Overlooking Structural Conditions
Stop and seek qualified guidance when removal could affect a load-bearing component, critical connection, stair, or railing.
KNOW WHEN TO STOP
What the Remaining Sound Wood Should Look and Feel Like
The cavity is ready for final preparation when the remaining wood is stable, firmly attached, and no longer sheds loose fibers under normal handling.
Firm Under Light Pressure
The wood should resist gentle probing rather than compress, crumble, or split apart.
Securely Attached
The remaining fibers and edges should not move independently from the main component.
Free of Loose Debris
Dust, fragments, and detached fibers should be removed so the repair system reaches a clean surface.
Dry Enough for Preparation
The area should no longer be actively wet from leaks, runoff, standing water, or trapped moisture.
Stable Around Connections
Joints, fasteners, brackets, and surrounding framing should remain secure and suitable for the planned repair.
Ready for Cleaning and Treatment
Once the unsound material is gone, the area can be cleaned, treated, strengthened, and rebuilt.
Continue with How to Prepare Wood for Repair for the next steps.
SAFETY FIRST
When to Stop and Seek Professional Guidance
Some conditions require more than normal repair preparation. Stop removing material when the component’s stability, structural role, or hidden condition is uncertain. Removing decay from a load-bearing member can reduce its remaining cross-section and capacity, so temporary support and evaluation by a qualified contractor or structural engineer may be necessary. For technical background, review the USDA Forest Products Laboratory guidance on evaluating and restoring timber members.
Load-Bearing Wood
Beams, posts, joists, and framing may require evaluation when decay affects a significant portion of the section.
Stairs and Railings
Components that protect against falls should not be weakened further without a clear repair or replacement plan.
Critical Connections
Beam pockets, brackets, fastener locations, and structural joints may require reinforcement or replacement.
Widespread Hidden Decay
Damage extending behind walls, roofing, trim, or cladding may require opening the assembly for a complete inspection.
Severe Movement or Sagging
Stop if the component shifts, sags, separates, or no longer appears stable during preparation.
Uncertain Repair Scope
Qualified guidance is appropriate whenever the condition could affect safety or structural performance.
NEXT STEPS
What to Do After the Rotten Wood Is Removed
Once only stable wood remains, clean the cavity, prepare the existing fibers, and rebuild the missing area with a complete restoration process.
Clean and Dry the Area
Remove dust and loose debris, correct the moisture source, and make sure the cavity is ready for treatment.
Treat and Strengthen the Wood
Apply the appropriate wood treatment and consolidant, and add reinforcement where the repair requires it.
Rebuild, Shape, and Finish
Restore the missing profile with repair material, shape the surface, and apply the correct primer and finish.
COMMON QUESTIONS
Frequently Asked Questions About Removing Rotten Wood
These answers cover the basic removal process. Structural or safety-related conditions should be evaluated individually.
Do I need to remove every dark-colored area?
No. Color alone does not determine whether wood is unsound. Focus on strength, stability, moisture, and whether the fibers remain firmly attached.
How do I know when I have removed enough?
Stop when the remaining wood is firm, stable, securely attached, and no longer crumbles or compresses under light pressure.
Can weakened wood remain if it is treated with consolidant?
Some weakened but still attached fibers may be suitable for treatment and consolidation. Loose, crumbling, or detached material should not remain.
Should the cavity have straight edges?
Not necessarily. The cavity should follow the actual decay. Removing healthy wood only to create a perfect square or rectangle is usually unnecessary.
Can I repair wood that is still damp?
The moisture source should be corrected and the wood allowed to dry before it is sealed inside a repair system.
What if the decay reaches a fastener or bracket?
Inspect the full connection carefully. Critical or unstable connections may require reinforcement, replacement, or qualified professional evaluation.
What comes after the rotten wood is removed?
Clean and prepare the remaining wood, apply the appropriate treatment and consolidant, reinforce when needed, and rebuild the missing area. Review the preparation guide.
CONTINUE PLANNING
Continue With the Correct Wood Repair Preparation
After removing all unsound wood, prepare the cavity, strengthen the remaining fibers, and rebuild the damaged area with the appropriate WRP repair materials.
Can Rotten Wood Be Repaired?
Review the conditions that make deteriorated wood a good candidate for restoration.
Repair or Replace Rotten Wood?
Compare restoration and replacement based on the remaining wood, structural condition, cost, and project scope.
How to Prepare Wood for Repair
Follow the cleaning, treatment, strengthening, and preparation steps required before rebuilding.